Saturday, 22 September 2012

Inspirational Road Trip

I recently went on a road trip with my friend to Cardiff, Wales, to see Noel Gallagher's High Flying Birds.

While we were there we took the opportunity to do a bit of sight seeing as we had never been to Cardiff before.

We went down to Cardiff Bay for a look round and I found so many wonderful little shops and attractions that have just filled me with ideas!

The first place we visited was The Wales Millennium Centre where the tourist centre was selling a lot of local gifts, such as slate tiles and coaster, welsh honey, and other novelty items.  I bought a lovely butterfly bottle top from here as a gift for my parents.
The centre also houses the Portmeirion Gift Shop.  These sold a variety of gifts and items that I loved.  They have an on line store here.  I was really inspired by a few items of their stationary, particularly a writing folder made from oil cloth with a map pattern.  Unfortunately I cannot find it on their website now, but yesterday went on a fabric shopping trip and saw some oil cloth with a map pattern so am contemplating whether to buy the fabric to make myself something similar.  Decisions decisions......

The next place we went was Craft in the Bay, the Makers Guild in Wales.  This was full of all manners of items from glass to ceramics, textiles to jewellery.  I loved it here, and would highly  recommend anyone into crafts visit here.  I saw various things I would like to have a go at making myself, such as intricately decorating hanging hearts to fabric jewellery and fabric/stitched wall hangings.

The picture shows items made by a textile artist called Susan Smith, links are also available for many more crafters part of the makers guild on the website.

We also visited the Norwegian Church Art Centre where they had an exhibition on by Andrew Coslett "Made in Penarth".  They were also showing some very interesting jewellery using colouring pencil but sharpened to about 1 cm long.  They were very cute!

The last attraction we visited was Lightship 2000.  Originally built as a light ship, it was bought by Cardiff Bay and restored to be a floating Christian Centre.  You can walk around all the areas of the boat, including the engine room, old sleeping quarters and light tower.  There is also a cafe on board, and a chapel that is still in use for services.

There were also a few independent craft boutiques within Mermaid Quay of the bay, including Zia and Fabulous Welshcakes to name a few with websites.  For the rest I highly recommend you visit!

Until next time, happy Crafting <3

xxx


Thursday, 20 September 2012

Bit of Crochet Design

Worked on a bit of crochet the last few days, after wanting some crocheted boot slippers for myself, but coming across various designs on the Internet for crocheted baby boots.  Having two young daughters I loved these!

The pattern I decided to have a go at was from a website called Topsy Turvy which gave me an awesome pattern for crocheted wrap around boots. I played around with the pattern and made a few different pair of booties.  The pattern is for a pair of boots to fit a size 4, around 9-12 months.


This is a very similar design to the pattern off of the Topsy Turvy website, though I did reduce the row after the sole to make the sole more defined.

With these boots I used thinner Calico thread, and had to adjust the design so that it fits a new born.  The website does give a link to size one boots but I made these at the spare of the moment so couldn't get to a computer to see the how to, so just improvised.


And lastly I had a go at a more 'fluffy' effect with a loop stitch after I looked up the loop stitch YouTube.

None of the boots have buttons attached yet as I still need to make a trip to the market, but I plan on going in the next few days, and making a few more, so I can post fully completed pictures pretty soon.

Also the last few days I was looking through various crochet pictures on Instagram and was inspired to make a blankets of flowers - individual crocheted flowers all sewn together.


Without thinking I began to make 5 point flowers.  After making about 16 flowers it dawned on me that the pentagon design is not the best to put together as a repeated pattern.  If I was going to make it into a blanket, it would look more like a lacy throw.  Here is a picture of the flowers I currently have put together in how they would be sewn together.


 So now I'm not too sure what to do with them? Continue to make the blanket/throw with this colours plus another 3 different colours, or to save these flowers for another project and start again making 6 point flowers?  Decisions, decisions.......Any advice anyone?

Well as usual, I still have hundreds of different projects flying round my head, and also I think now is the time to really start thinking about Christmas (only 13 and a half weeks!)

So until my next post, happy crafting <3

Monday, 17 September 2012

Patchwork, quilting and a new addiction

So, as promised, here is my post on my new found love of patchwork and quilting.

So, it all started when I received a free patchwork magazine with one of my craft mags, and I saw an advert for quilting classes in Sheffield, where I live.

The course was at Patchwork Garden, and I had been thinking of taking a class in something, so I thought "why not"

So I went in and the owner, Tricia, was very helpful, and a really good teacher.  She showed me a small cushion front people make as their first project, and told me to pick 4 colours, two main, one light and one dark.  I chose two different owl patterned fabrics, a blue and a cream.


Tricia showed me some of the basic patchwork techniques for blocks, small blocks, larger block and triangles.  I went for 2 full day sessions to complete this mini quilt, the first day spent doing the patchwork, and the second day I spent layer and quilting it.

This is the final piece and I am so happy with it for my first attempt, it is going on my wall.


Whilst I was making my first mini quilt I was given a few magazines to have a read through to try and decide if and what I wanted to do next.  I learnt a lot from these magazines, so much so I decided to take on a mammoth task (according to Tricia at the shop) but I had confidence in myself.  I will eventually be an eight point star quilt.  I have designed the pattern myself from looking at different patterns through the magazines.

I am working with 5 different colours for the start, and I tried to graduate the colours out from black to purple to blue and finally white.  The start is made up of 8 diamond shape, and each diamond is assembled by cutting numerous strips of my fabric, stitching them together staggered, so they can then be cut into strips at a 45 degree angle.


I have so far made 3 diamonds, and got the majority of my strips cut to finish the other 5.  This is what I have done so far, so I hope to keep you updated with my progress.


As usual comments, questions, anything is welcome, and do please follow me here on my blog, or any of my other media sites at the side, if anything I do interests you as I would love to hear from you!

So until next time, happy crafting <3


Wednesday, 5 September 2012

Sewing, patchwork, crochet and more

I went to Patchwork Garden again this Friday just gone, and had an awesome time as usual.  Am now working on a diamond star shaped quilt, big enough for a double bed.  Haven't had much time to take pictures of what I have done so far on this though, so will leave talking about it too much for now.  I will take some pictures so hopefully we can look at it in my next post.

However, I have got some pictures to show you today.  The first being my completed crochet blanket.  My daughter loves this, shes started to sleep with it at night. I talked about making it though a lot in my last post, so u won't go into it again, just wanted to share the completed pictures.

Next to show you are my crocheted hanging heart decorations. The first one I have shown before, a single purple heart hung with ribbon and stuffed with ordinary toy stuffing I had from my owl doorstops.


The second idea I had evolved to make was a triple heart hanging, decreasing in size and again hung, and joined with ribbon. The principle was the same as the first heart, but the wool I used was a lot thinner, and think it shows particularly with the larger heart. But none the less I like it and it is now hanging in my kitchen.


I hope you've enjoyed this short but sweet installment.  If you have any questions please don't hesitate to get in touch or leave any comments you like.  My next post I will look at the patchwork and quilting I have been doing, but for now, happy crafting.
Sam <3 xx


Tuesday, 28 August 2012

Taken a break but not forgotten

Well, its been nearly 2 months since my last post, I have just been so busy.  My computer has been failing me, but to be honest with everything I have been doing getting just 20 minutes to update has been difficult.

But I'm back, and have I got some things to tell you about.

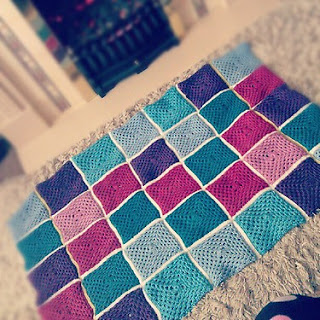
First to the crochet blanket I was working on.  This is now complete, and I am so pleased with it.  It ended up being a lot bigger than I initially intended but I am so happy with the result I am now working on a baby blanket.
Towards the end of making it I had to take the time to sit down and really think about the colours and arrangement I was going to use, because, firstly, my wool was limited and I didn't want to run out of one colour as I wouldn't be able to get hold of exactly the same wool, and secondly, because I wanted it to look kind of 'random' which is something I find really difficult.  A lot of my work and projects centre around symmetry, I like very symmetrical, repeating patterns, but I don't think it would have worked on this blanket, especially with the number of different colour squares I had to work with.
That's not to say there isn't a pattern within the blanket! I was unable to steer myself totally toward randomness, there is a pattern in there! But like I said I am please with the effect I have achieved.

a crocheted blanket handmade with granny squares

Next, I have also been learning patchwork and quilting.  I have attended a course at Patchwork Garden, Sheffield where a lovely lady call Tricia has been teaching me the basics.
Here is the patchwork I have done before it was layered and quilted.  I didn't spend long choosing the fabrics as I just wanted to get on and learn, and as I was putting it together I really wasn't sure they went together.  However, now the patchwork has grown on me and I am so happy with the results.

A patchwork mini quilt handmade with an owl theme

I have also been making my first ever bag! its a Cath Kidston pattern from her book Sew!  Although I have learnt things regarding assembling a bag, the biggest lessons I am learning on this project is all about my sewing machine, and tensions and just the importance of understanding your equipment.
Here is the bag half put together, just need to add the handle with some buttons and button holes

A bag machine sewn from a Cath Kidston pattern

As you can see, none of the photos in this post are actually finished projects.  I want to be able to take some good pictures of what I've done, with good light. But typical north England weather has been putting a stop to that! Once I get them though they will be straight up :-)

As always thanks for reading

Sam <3

Friday, 6 July 2012

Time, Motivation and moving forward

So, I have been giving a great deal of thought recently to where I am now and where I want to be and what I want to achieve.  I know, eventually, I would like my crafts to be more than just a hobby. I know to achieve this, not only do I still have a lot to learn, I have also got to find my niche. I feel I am so eager to have a go at so many different crafts I'm finding it difficult to consistently work on something, or even a variety of things, that I could successfully sell on. Would even like to look into being able to run classes or craft clubs, being able to share my interest with like minded people.
So, the question now has to be, how do I get to where I want to be, what goals do I need to set myself in order to achieve my dream?
I'm a part-time working mother of 2 under 3 year old daughters. At the moment the best times for me to be able to sit down and get a good couple of hours work in is after bed time.  This is when I spend most of my time for my bigger, more time consuming projects.

I have also rediscovered my love of crochet.  I have made a few home decor hanging hearts as well as being in the process of making my first blanket.
For the heart which is pictured I also made the beaded charm to hang off it, and then gave it as a thank you gift to someone.

To make the blanket, so it doesn't seem as daunting, I have told myself I will make at least a square a day. This, I feel, is going really well. I so far have about 11 squares with a further 14 to make plus the putting together.
Crochet is something I really enjoy, plus something I find relatively easy to squeeze in around my girls, especially in the day, say at nap time or down time, I find it isn't something that requires at least a couple of hours concentration, like, say, one of my sewing projects.
So my goals: I am currently learning to drive so that I am able to travel and attend craft shows. In the meantime, I intend to keep working on various items I think I could sell, building up a stock for when I can get out. I would also like to start building some sort of online presence. I have this blog and a facebook page, as well as using Twitter, Pinterest and Instagram to share my pictures and thoughts. I feel its this cyberworld marketing I need to learn the most with, or get as much advice about as possible.
So, that's about it for this installment. As always I will keep you all updated as to my progress. I thank you all for reading and following me. If you don't currently follow me, please consider adding me to your friend list, and for everyone, please have a look round my facebook page, or just follow me on Pinterest, Twitter or Instagram. All comments always welcome, good or bad, and I hope to be hearing from you all soon.
For now, happy crafting
Sam <3

Monday, 28 May 2012

'Sugar Skulls' keyrings

I was watching a program on the travel channel a few weeks ago on Mexico and there was a section on the central and sourthern Mexico festival of dia de los muertos. It showed people decorating skulls and having gatherings or even parties round loved ones graves. It explained about how and why this festival was celebrated, and I just loved the idea.

Of course I'd seen these skull designs as tattoos, as they seem to be popular at the moment, and I am a fan of tattoos, but I decided I wanted to know more about the background of these skulls and what they represent.

I did some searching on the internet and came across a variety of sites, all explaining dia de los muertos. It's a central and southern Mexico festival, translated, means the day of the dead. Indigenous people believe that at midnight on 31 October the ghost of child past return to there families for 24 hours when the gates of heaven are opened. Festivities go on until 02 November when adult ghosts come to join the festivities before take the children back.  The families decorate for their arrival with beautiful altars, using candles, flowers and brightly decorated skulls. Plenty of drink and food suck as fruit, peanuts, tortillas and bread are also used in the decorating for weary spirits.  Toys and candies are also offered for the spirits of children, then on 02 November cigarettes and shot of mezcal are offered for the adult spirits.  On 02 November in the afternoon the festivities are taken to the cemetery where tombs are cleaned, people play cards, listen to music and reminisce about loved ones.

I just loved the idea of this, celebrating people who have passed, so I have made these embroidered sugar skull keyrings.


On analysis I think the green one I've made is a bit too busy. The orange one I think has a good balance but the black one us my favorite.

 I'd love to know other peoples views, not only on the keyrings I've made, but on the festival itself.
I am going to be selling these keyrings for £2 plus p&p, on a first come first serve so if your interested in one please message me.
If its not something that interests you, but you know someone who might like them please pass on and share the link.
So until the next time, happy crafting peoples xxx

References for this article:
http://www.mexicansugarskull.com
http://en.wikipedia.org/wiki/Day_of_the_Dead
 

Monday, 7 May 2012

Handmade and hand binded sketch book

This is a sketch book I recently made for one of my friends birthdays.  It took me about 6 hours in total to make but she is well worth the time spent.  It is the very first time I had made a felted picture, or even a book for that matter, so considering that I really don't think its turned out bad at all.  Yet again I am proud of myself!

Its made out of felt, card board (cereal box), cartridge sketch paper and thread.

I started off making the felted picture first, using my faithful felting needles and some wool tops.

It took a little getting used to using the needles with the wool, and essentially 'paint' with the wool threads, but towards the end I think I really got the hang of it.  Enough control to write with it anyway.
Can't wait to try another felted picture now......

Next I put the book together.  I got 24 pieces of A4 cartridge paper, folded them in half in sets of 6, making 12 pages.  The pages needed trimming down due the inner pages of the fold protruding.  But I ended up with 4 sets of 12 pages (6 pieces of paper folded).
I then had to make a template for where I was going to thread the pages, and for where they were going to sit within the spine.  My spine ended up being 12mm wide ,with the pages threaded onto the cardboard I'd cut for the spine equally.


I then started putting the cover together, hand sewing pieces of felt to my felt picture for the front cover and the same colour pieces of felt for the back cover.  I cut 4 pieces of card board to the size I wanted the front and back cover.  I glued the sewn felted pieces I'd made on a piece of cardboard, one for the front and back, and the other 2 pieces of card board I glued onto the inside of the spine of the book.  The pieces of felt on the card board were then glued onto the cardboard glued on the spine, and the overlapping pieces of felt were trimmed, turned over, glued and then sewn on to the inside of the cover.
I then took a thin piece of felt for the spine to sew it onto the the front and back felt covers.  The book was completed by gluing patterned paper onto the inside of each cover.


Tuesday, 1 May 2012

Felted Creations

As I have been awaiting the arrival of my oven thermometer I thought Id try my hand at some needle felting.
I have already done a needle felted 'picture' for a present I am making for my friends birthday, but I am going to keep that little project a surprise until I have given it to them, just in the interest that they might read this and then my surprise will be spoilt :-(
However, I have made some little needle felted animals from the wool tops I had left.

I have two types of needle, a single, 25 Gauge triangular needle, and a 7 needled needle felting tool.

For these animals though I have mainly used the single needle as the tool didn't allow for details, though was handy for felting the balls for the body/head.

So first off I tried my hand at what started out as a cat.  Unfortunately though, it didn't quite go how I wanted it to go in my head and ended up looking like, what I think, is a dog.........


Although this technically did go wrong I was quite happy with it for a first attempt.

Next I tried my hand at an owl.

I felted 2 balls first, one in white and one in blue ( I picked these colours on the request of my Dad who is a Sheffield Wednesday fan, and these are their colours). 
On the blue ball, the head, I used my needle and a little more wool to create little ears on the top of the head.  I then felted these 2 balls together.
Next I felted the two wings separately before adding them to the body.
I then added the eyes, though I think these are a little bit off.


Over all though I am quite pleased with what I have done, and after all it is meant to be a learning experience.

Until next time <3 <3 <3


Monday, 23 April 2012

Fimo Soft and Halogen Ovens

As previously mentioned, have been working on some polymer clay Jewellery.

I started out with just some ideas of what I wanted to make, but was a complete novice to polymer clay. Didn't have a clue what brand to buy, so ended up just buying some off eBay's.  Fimo Soft is what landed on my door mat.

I've been experimenting with it for about a week now, and we've had our ups and downs, with a fair bit of help from the lovely people over at the Crafts Forum and the Clay Forum.
As I have been using the Soft variety of Fimo I have had my issues with the clay becoming very sticky, sticking to my tools, though this, lucky, has only happened on one of my sessions.
The biggest issue I have had have been while curing the clay, and even now I am still mastering what needs to be done.

Basically I have been curing my pieces in a halogen oven rather than a conventional oven, for 2 reasons.
The first being that my gas oven is next to dead. Why we still have it is beyond me it is so unreliable.
The second being the halogen oven is a lot smaller, therefore takes a lot less time to warm up and is able to maintain a fairly constant temperature, I think.
I say I think, because I am not 100% sure of this, I am going on advice I have found or been given regarding halogens, but I have ordered an oven thermometer just so I can be sure.

The thermometer has been order though because I have been experiencing problems curing my pieces. The packaging state 110 degrees C for 30 mins to bake the Fimo Soft.
Before baking anything I did my research on the 'net, especially since I was using a halogen.
So the first lot of pieces I made were baked firstly for 20 mins at 110 C (according to my halogen dial), but the clay when cooled was brittle.
I then baked my next pieces for 30 mins at 110 C, but again my pieces were brittle.
My third set of pieces were baked for 30 mins at around 120 C, and though these pieces came out a little harder, they were still flexible with a rubber sort of feel to them.
My last test pieces were bake for 40 mins at around 120 C with some surprising results.  Here I should say that I have been baking my pieces flat on a ceramic tile. On this experiment I had a test piece which lifted from the clay, and another that was double the thickness of anything I had previously tested.  The piece the lifted up from the tile had cured where it was lifted, but still had a rubber feel where it was flat to the tile.  The thicker piece was pretty much completely cured, which has told me that I either need to bake on a rack or put something between the clay and the tile.

Advice from the forums have been to put either normal or baking paper between the tile and the clay.  I am also going to try baking in a 'tent' of tin foil to protect the pieces from the halogen bulb, due to the size of the oven.  Am going to wait though now until I get my oven thermometer just to be sure my oven is at the temperature it is stating and this isn't my problem.


Will keep you updated as always, so for now Happy Crafting

Wednesday, 18 April 2012

Projects underway

Hi all
Just thought I'd post an update on my progress with ongoing projects as not posted anything since my post stating I was back, but not posting anything sort of contradicts what I said, no?
Anyway, as I've said just want to update my project progresses.
The present I am making for my friend, the hand binded sketch book, covered with a needle felted picture is nearly finished. Few touch ups on the felting to be finish. Then the book just needs binding. Here's a picture of how the felting is looking, apologise for the quality, not the best light.
The other project I've been working on is some butterfly polymer clay jewellery. I've been experimenting curing the clay in a halogen oven, and have to say I'm loving it! There is better control over temperature, and as they are a lot smaller than my oven, reaches the desire temperature a lot quicker! Am loving it!
That's it for now though. Will catch up when these projects are completed now I guess. Til next time......


Tuesday, 10 April 2012

4 weeks and I'm back!

Just wanted to update you all that, on 10th March 2012 I gave birth to my second daughter, Lily Anne

Due to this I have taken a 4 weeks 'settling in' period, but am now back and ready for crafting :-)

Got a list as long as my arm for projects that need completing or even starting, but my first tasks are 2 owl doorstops for family members, and my best friends birthday present for beginning of May.  I am making her a sketch book which I am binding myself, and covering with a needle felted picture I've been working on.

Will keep you all updated on my projects as I go along, but for now, happy crafting xxxx

Monday, 5 March 2012

Paper crafting

After seeing a pin on Pinterest recently from the blog, Homespun with Heart, I decided to have a go at making some paper flowers.

I then used these to decorate a heart, which I plan on hanging up with some ribbon as a cute decorative item.

Here are a few pictures of my first attempt


If you look carefully (though not sure it shows up too well on this picture) there are small gaps, and I'm not totally happy with all the flowers, though as I have made more I have gained confidence with them.

Therefore I am going to attempt another one, hopefully make it gap free, with flowers that are more similar in height, but not necessarily size as I think that variation helps with the look.

As I do plan on making another because I wasn't totally happy with this one I haven't bothered adding the ribbon to it.  However, my mum didn't want this first attempt to go to waste, as I was just planning on putting in my craft box and probably forgetting about it, so she has used it in her bedroom and stuck it in the middle of her bed head board (What would we do without proud parents????)
I have to say though, from a distance it looks pretty cute (if you dont get close enough to notice the gaps)


Will keep you updated with any new ones I make.

Until next time :-)

Thursday, 1 March 2012

Completed Owl Doorstop

Today I finished my full size owl doorstop, and am really pleased with it.

Its a nice size and weight to do it job, and the sewing on it is a big improvement from my very first experiment.


And here it is in comparison to my first two owls....

I am really pleased with how its come out, and seems other people are too as I now have a request for my first commission one! Bonus!

Hope my readers also like them, and as usual any feedback always welcome!

Until next time

Oya Designs

Wednesday, 29 February 2012

Textile Owls

So I have made further progress on my owl designs to hopefully use as doorstops.  I have so far made two mini versions, both with their good points and bad points.

The first one I made was the one with green eyes.  It had been a good few years since I last used a sewing machine, so used this first one to try and figure out the best way to attach each component of the owl.

I used the sewing machine to pretty much attach everything, the eyes, eye outline and beak.  I thought this looked a bit messy tho, particularly the eyes, so with the next owl I made I attached the eyes with the sewing machine, but just using black cotton to attach both the black and whites of the eyes just sewn through the blacks of the eyes, and this was sewn onto the eye outlines.  I then hand stitched the eye outlines onto the body, which I think looks a lot better.  I stuck with sewing the beak on with a zig zag stitch on the sewing machine but didn't bother with the stitching down the sides of the beak.


When it came to the wings, with the first owl I attached them with a hand stitch at the top of each wing, so the stitch and seam was visible.  With the second owl, however, I tried to hide the stitching as much as possible, still doing it by hand but pushing my needle through the body fabric and the underside of the wing to try and hide it as much as possible.

 Each owl was stuffed with craft stuffing and rice to give them some weight. The second owl I think was stuffed better than the first, knowing to use more of everything to make it bulkier.

These two owls only measure about 25cm tall and 25cm wide.  I now have the fabric cut out to make one double these sizes, hopefully using what I have learnt to make a much better version.


Will keep you updated with the progress of these.....................
........................til next time!